
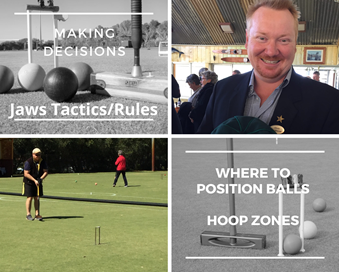
Jaws Tactics/Rules
This is very simple and very crucial to games where you are attempting to “break” your opponents serve. It shouldn’t need to be said but there is no point trying to jaws when your opponent is on the non playing side or in a jumping position and you are not able to block or clear that ball before they play.
Jaws odd numbered hoops – this allows you score a Hoop and make Position on the next one. The easiest and most commonly sought methods of breaking serve on the next hoop.
Jaws even numbered hoops – this is where some of the skill or tricks come into play. If I am jawsing an even hoop and my opponent does not have a ball behind or in a jumping position then I can afford to leave my ball in the jaws for a while to give me the best chance of scoring the next as well. The two easiest ways to do this is to have your ball positioned on the outside of the hoop. If it is short (scoring side) you can promote the jawsed ball through the hoop and ricochet towards the next one (more than half way) legally. If it is long (defensive side) when the jawsed ball makes the hoop you are placing it so that the outside ball can promote it to the next hoop easily.
Where to Position Balls
As mentioned the first rule of GC is very simple – 9 times out of 10 if you are first to the hoop get into a scoring position. Although you can score 30cm out from the hoop directly in front, surprisingly for many people this is not always the best place to be. In AC you have the 4 zones or quarters around a hoop; attacking and defensive quarters. GC also has these zones but instead of simple quarters they are more comprehensive. I like to think that a GC hoop has 12 zones radiating out from each hoop.
Hoop Zones
Attacking Zones – The first zone is the hoop width corridor directly in front of the hoop extending back to the boundary. This small patch of grass in the scoring zone is where most players aim for. I am suggesting this is actually not the best place to be. Directly in front of the hoop allows you to score but it also allows for potential in-offs by the opponent when you were first to a hoop. If you are second to a hoop on odd hoops and you are in this zone, if your opponent scores first you are actually wiring yourself from the next hoop. Also if your opponent jaws or blocks and you cannot jump that distance, you limit your ricochet potential to the next hoop. A ricochet from straight on tends to send your ball away from the next hoop. If your ball was more angled to the hoop a ricochet for the next hoop will often straighten you up towards that hoop.
The next zone is the wedge from the centerline of the hoop to between 30-35 degrees on the short boundary (skinny) side. This is the ideal position for most balls as you can score in this zone all the way back to the boundary fairly easily. Being on the skinny side gives you the power of the hoop and your opponent cannot get a lucky inoff from this ball. The mirror image of this wedge is on the far boundary side (fat). These three wedges combined are the scoring zone of the hoop. When your opponent is in these areas you need to block, clear or score before they do.
Jawsing Zones – From the 35 degree angle to 45 degree angle it is technically still possible to score the hoop. Although you have scoring potential it is quite likely that players will attempt to jaws their ball when in this small wedge on either the fat and skinny sides of the hoop. I call these two wedges the “jawsing” zone. If your opponent is first to a jawsing zone then play your first ball to the defensive side to counter the jaws potential. There is no point playing your second ball to the hoop on the defensive side. Your second ball needs to be on the attacking side of the hoop to keep pressure on.
Defensive Zones – If you flip these 5 mentioned wedges over to the defensive side of the hoop the same ideas can be used. I prefer not to use the corridor directly behind the hoop as it is too easy for my opponent to use the maximum hoop width to wire from me. If I am playing on the defensive side because I think my opponent will jaws then I prefer to be within the 35 degree wedge on the fat side. This allows me to clear a jawsed ball and ricochet to the short boundary only. Being straight on does give you a chance to run through the hoop to block or position but this is often desperate play. That leaves two zones on either side of the hoop. These are the large 90 degree wedges that extend from 45 degrees attacking to 45 degrees defensive. These side wedges are primarily used to defend the scoring zone from your opponent. Usually you are placing yourself in one of these zones as the second player to a hoop and wiring yourself from your opponent’s first ball that has been played badly. If you are first to the hoop it is pretty pointless being on the side of the hoop unless you are attempting to play PPHH style. Even then being in one of the side zones allows your opponent to snatch the power of the scoring zone if they manage to wire from you. First to the hoop you have everything to lose from the side of the hoop. Second to the hoop you have everything to gain if you can nail the wiring.